Examples and Demos
The following examples demonstrate and show how to use the CM1-T on a few different PLC platforms. All examples include application source code so they can be further explored.
Codesys™
EtherNet/IP
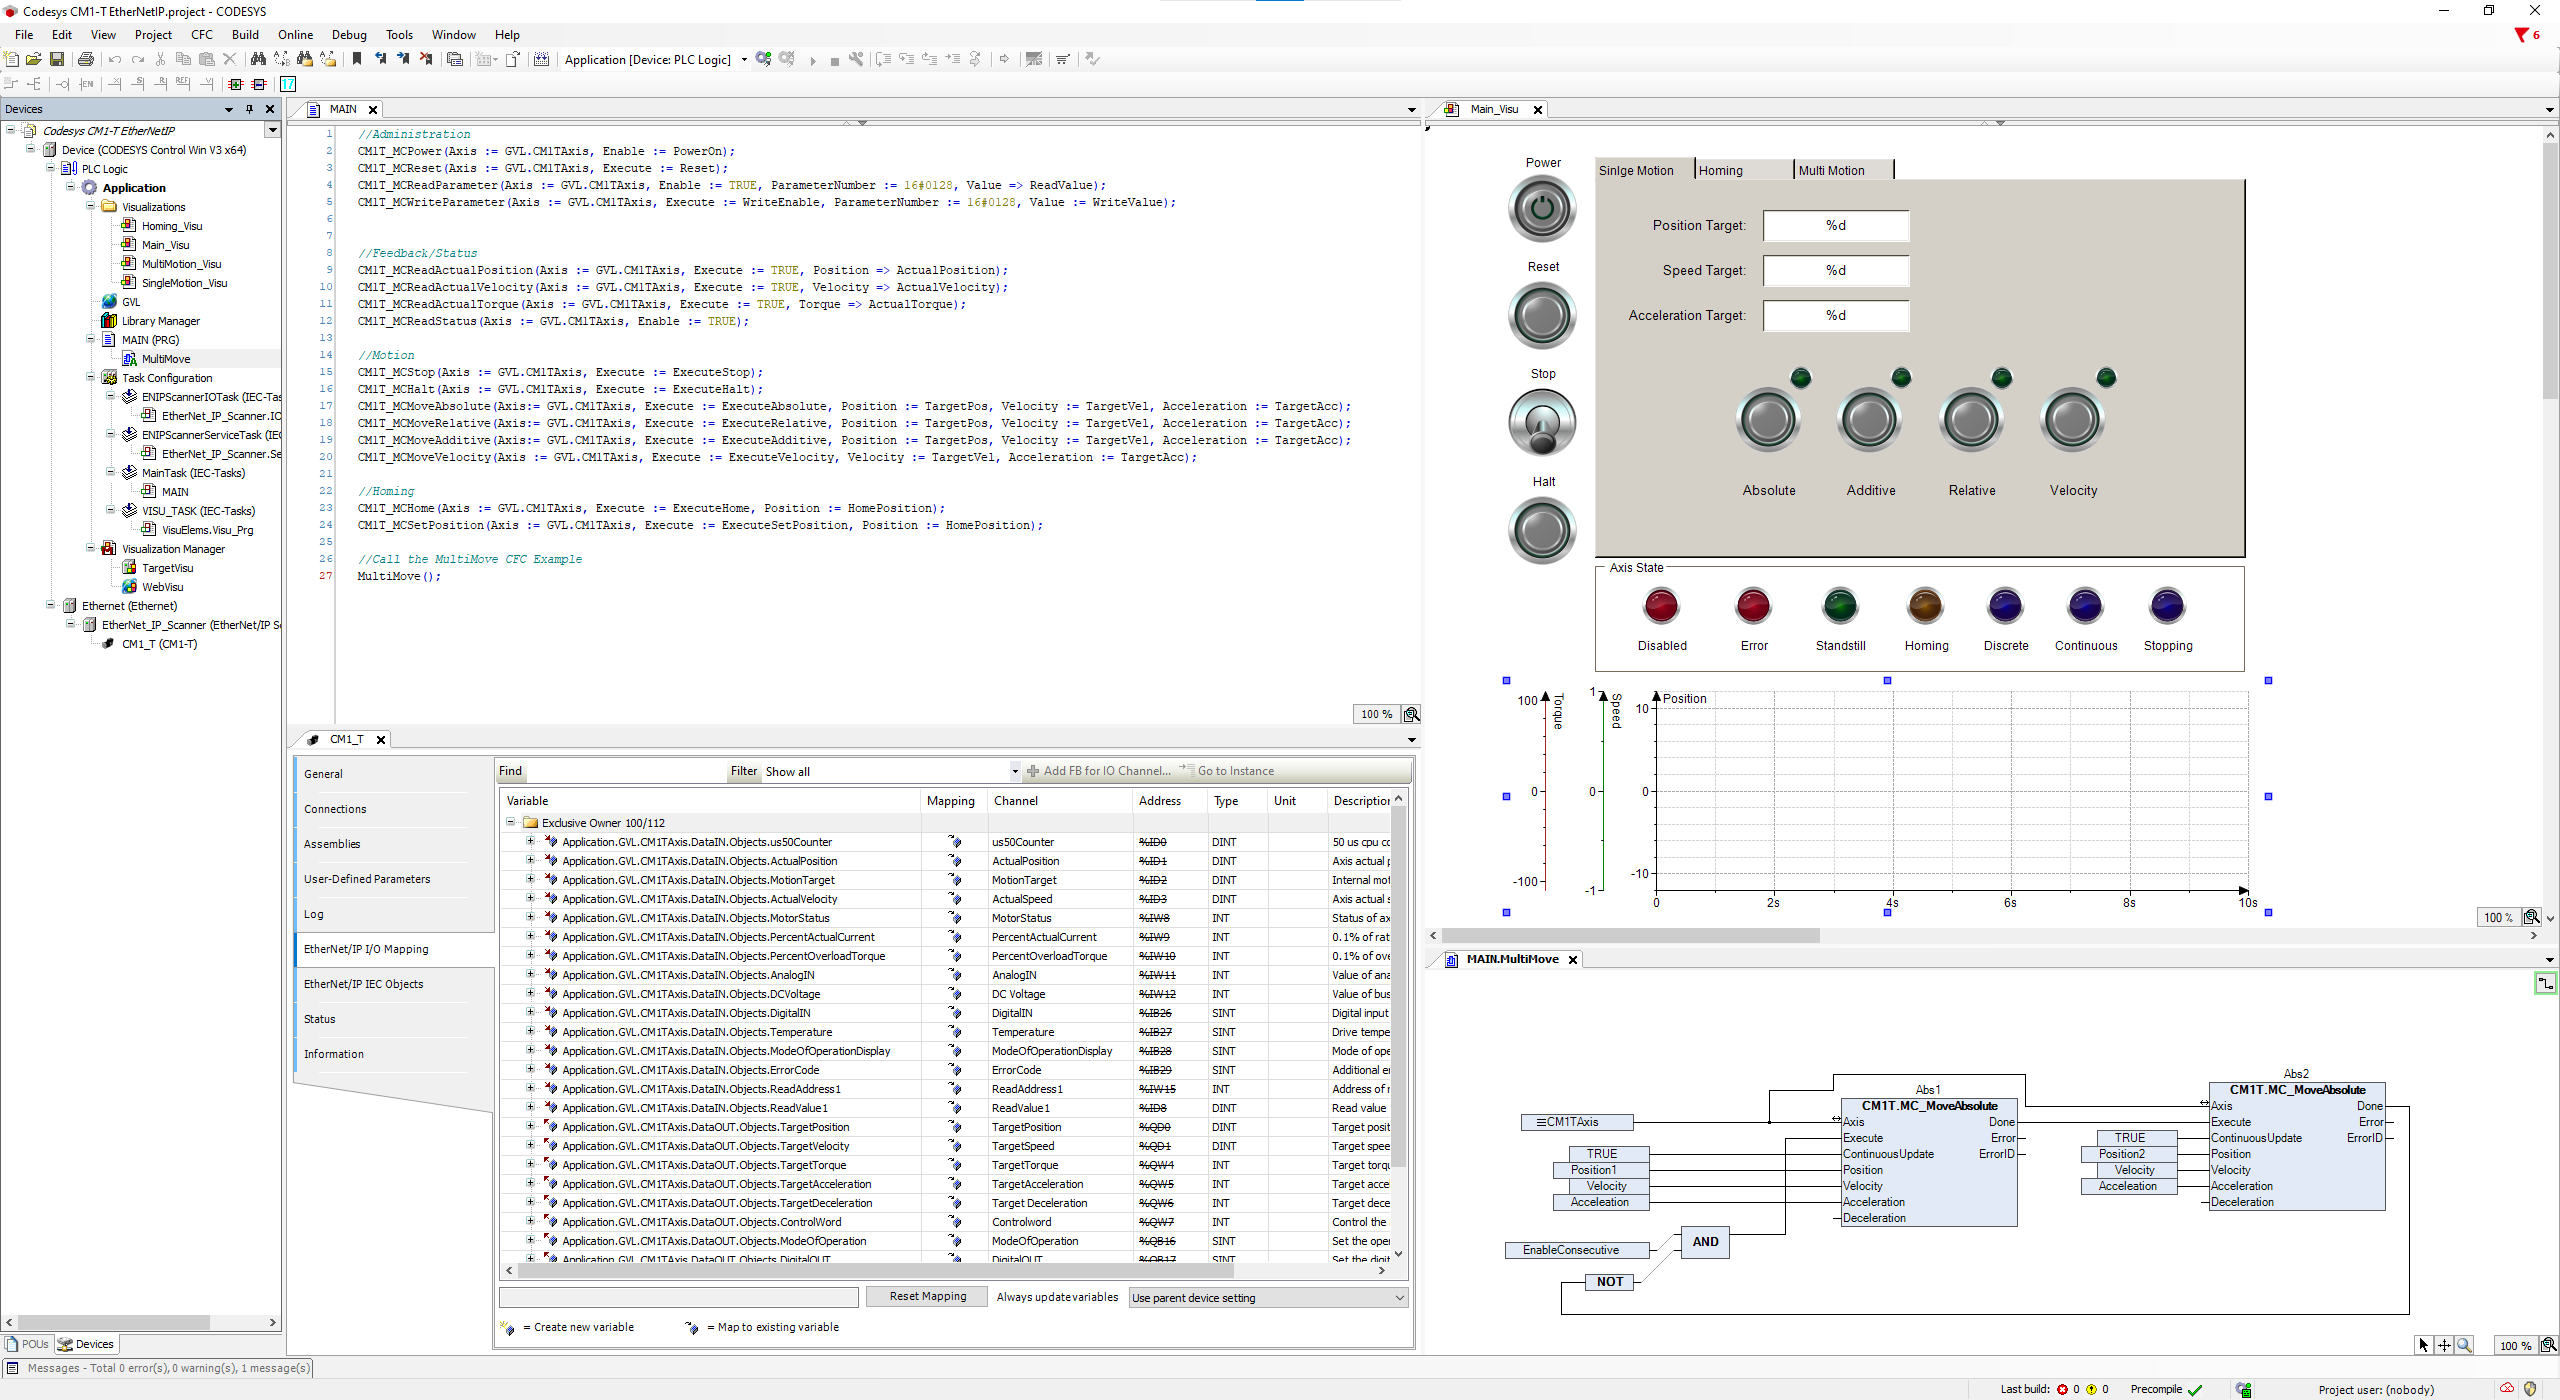
Codesys Control Win PLC controlling a CM1-T using EtherNet/IP and the CM1T library
Downloads
Codesys Project - V1.0.1.0
CM1-T library
Modbus TCP
Codesys Control Win PLC controlling a CM1-T using Modbus TCP and the CM1T library

Downloads
Codesys Project - V1.0.1.0
CM1-T library
TCP/IP
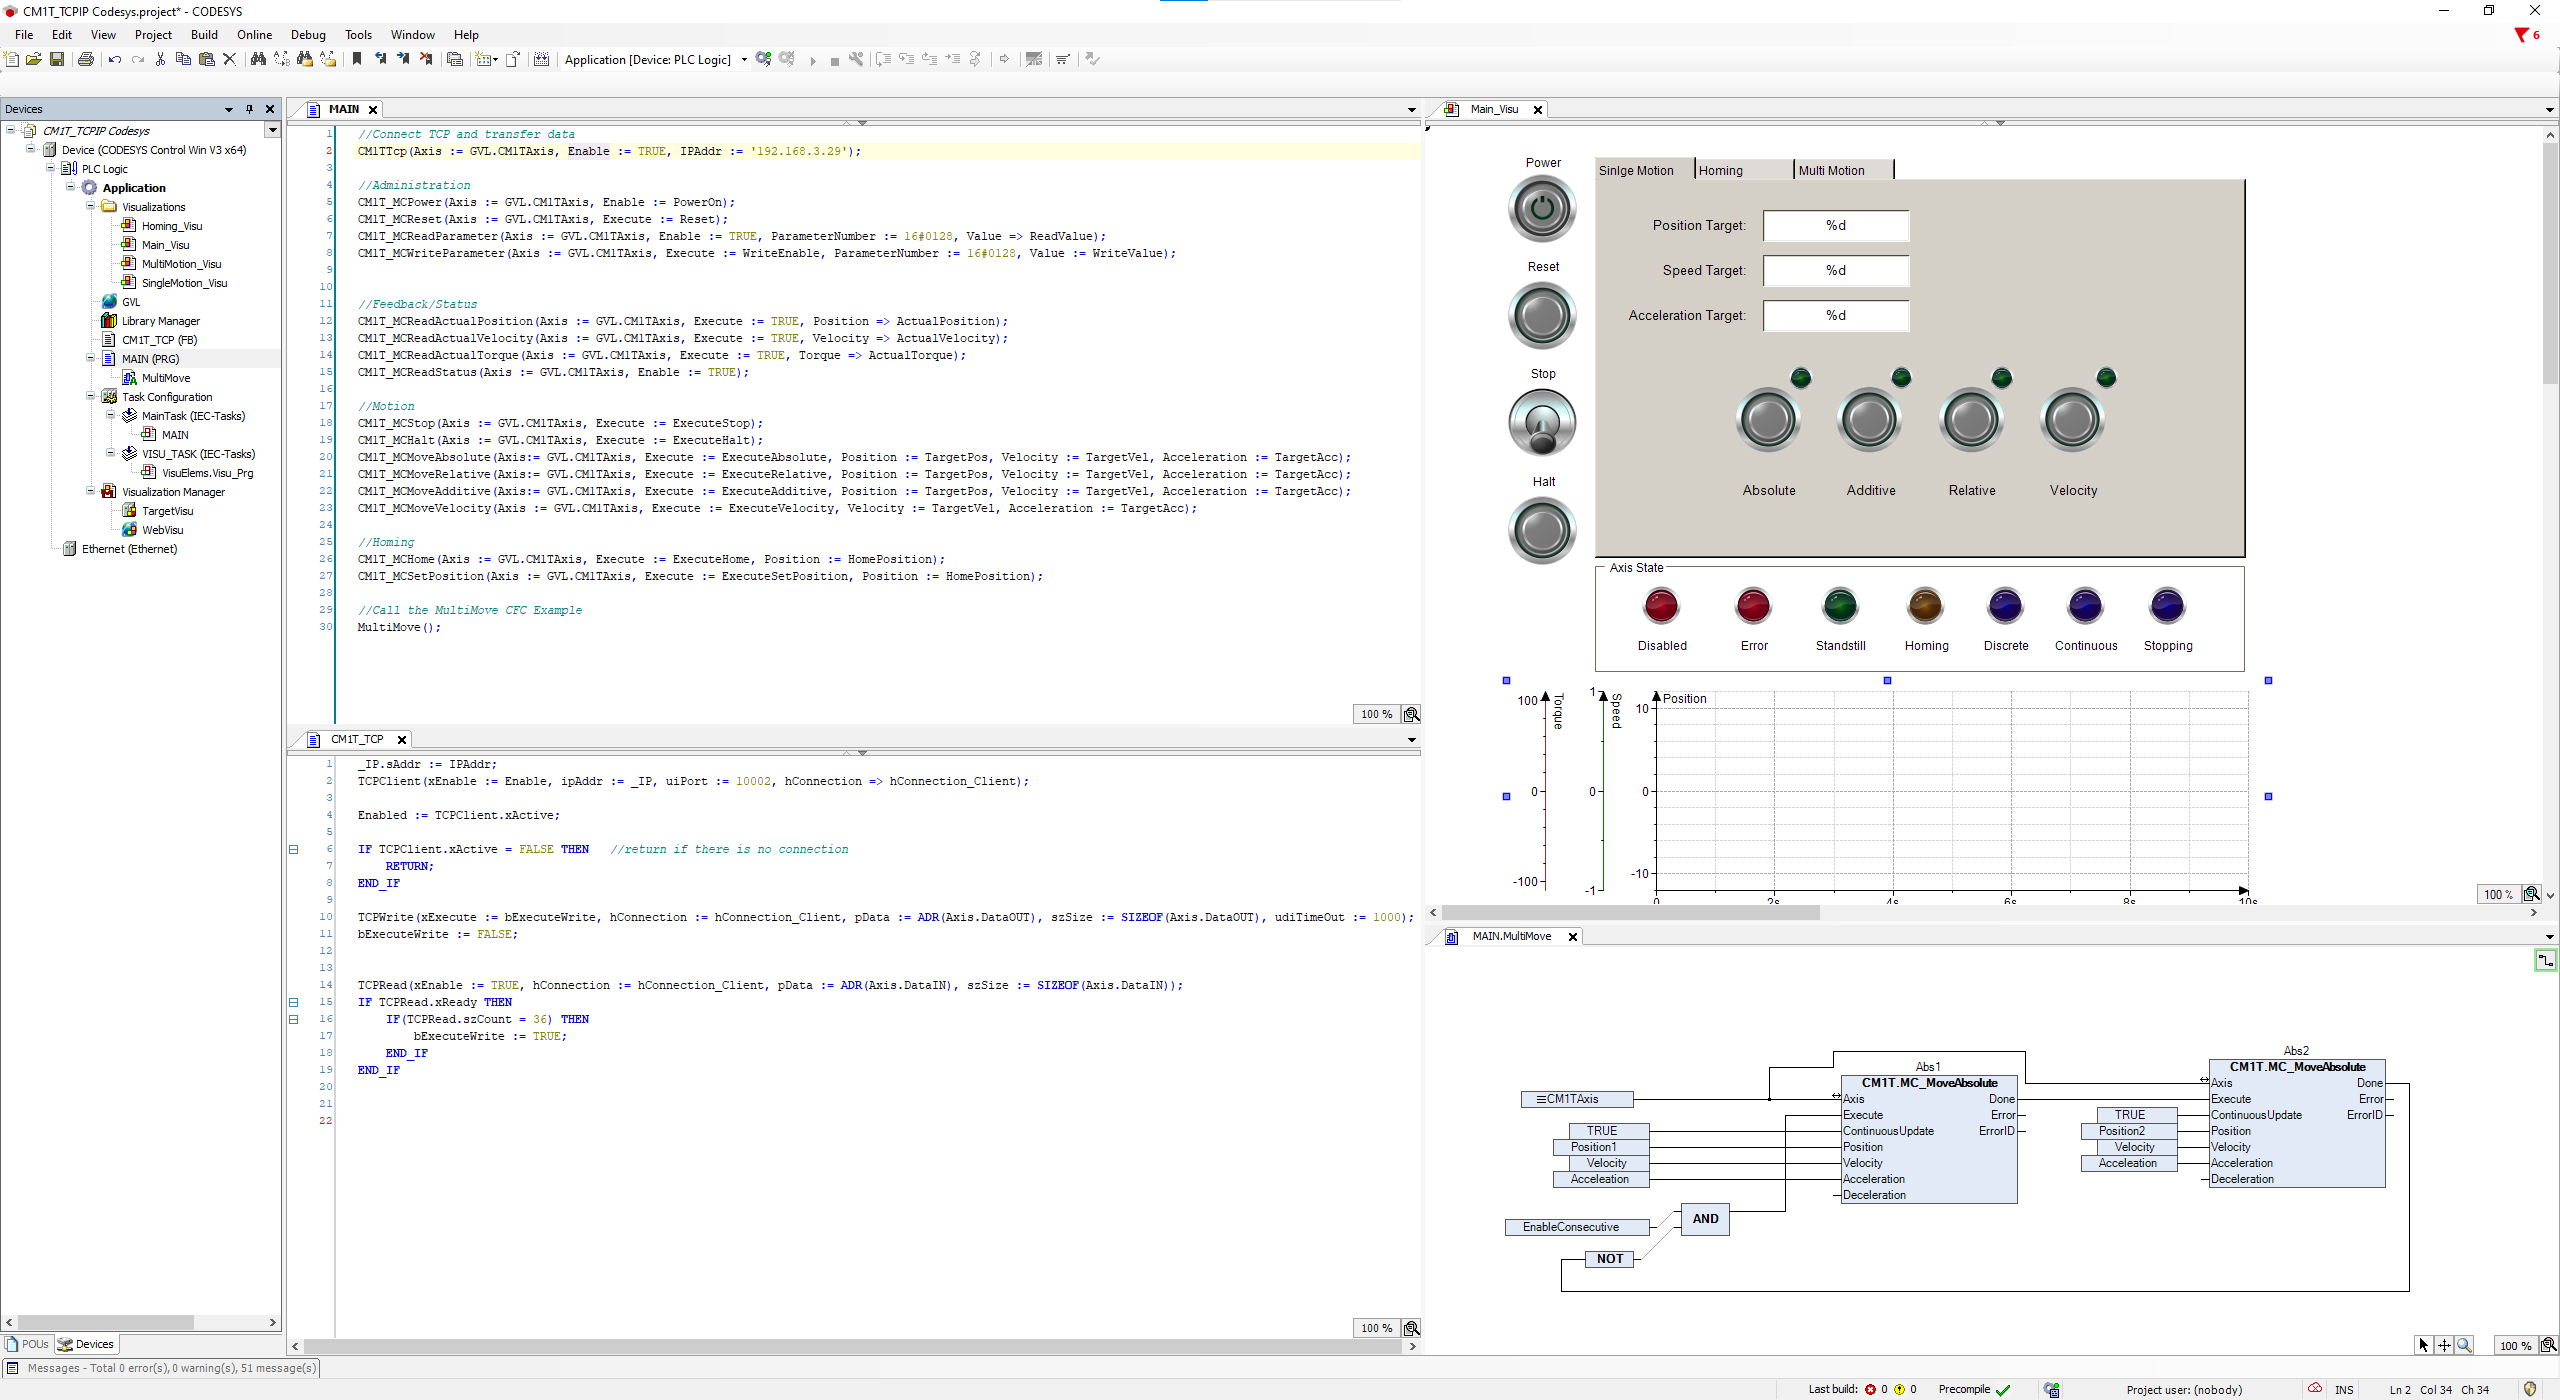
Codesys Control Win PLC controlling a CM1-T using TCP/IP and the CM1T library
Downloads
Codesys Project - V1.0.1.0
CM1-T library
Schneider EcoStruxure Machine Expert™
EtherNet/IP - CM1-T connected to Schneider M241 Series PLC using EtherNet/IP
This demonstration and example video shows how to connect a CM1-T Cool Muscle motor to a Schneider PLC over EtherNet/IP. The video further demonstrates using the CM1-T library to control and monitor the motor with standard PLCopen (MC) function blocks. The demonstration walks you through the following steps:
Starting a Machine Expert project
Adding the CM1-T EtherNet/IP device to the Device Repository
Adding the CM1-T IEC 61131-3 PLCopen Motion Control library to the Library Repository
Adding the Industrial Ethernet Manager Device which in this instance acts as the EtherNet/IP scanner
Adding an EtherNet/IP Remote Adapter (CM1-T)
Mapping the adapter remote IO to the CM1-T library instance
Calling multiple library functions to run and control the CM1-T through visualizations.
Machine Expert Source Code
CM1T_Demo.zip (Machine Expert V1.2)
CM1T_Demo _V2.zip (Machine Expert V2.0)
Library Files
The CM1-T device and CM1-T library are required. The files can be downloaded here:
Modbus TCP - CM1-T connected to Schneider M241 Series PLC using Modbus TCP
This demonstration and example video shows how to connect a CM1-T Cool Muscle motor to a Schneider PLC using Modbus TCP. The video further demonstrates using the CM1-T library to control and monitor the motor with standard PLCopen (MC) function blocks. The demonstration walks you through the following steps
Starting a Machine Expert project
Adding the CM1-T IEC 61131-3 PLCopen Motion Control library to the Library Repository
Adding the Industrial Ethernet Manager Device which in this instance acts as the Modbus TCP Master
Adding a Generic Modbus TCP Slave to connect to the CM1-T as a Modbus Slave
Creating and setting up the Modbus channels with Read/Write Multiple Registers (Function Code 23)
Mapping the Modbus channel data to the CM1-T variable instance
Calling multiple library functions to run and control the CM1-T through visualizations.
Machine Expert Source Code
Schneider - CM1-T MDB_TCP.zip (Machine Expert V2.0)
Library Files
The CM1-T device and CM1-T library are required. The files can be downloaded here:
Automation Direct - Do-more! Designer
Modbus TCP - CM1-T connected to BRX PLC using Modbus TCP
This demonstration and example video shows how to connect a CM1-T Cool Muscle motor to a BRX PLC over Modbus-TCP using the Do-more! Designer development environment. The video demonstrates using the CM1-T Modbus user profile and the supplied subroutine to simplify development and control of the CM1-T. The demonstration walks you through the following steps
Saving the Modbus TCP user profile for use in all Do-more! Designer projects
Importing an existing project to copy the CM1-T subroutine
Adding a Modbus TCP module. In this case the CM1-T integrated Cool Muscle motor.
Adding and calling a subroutine in Do-more! Designer including passing parameters in and out of the subroutine.
Creating logic to power and run the CM1-T integrated Cool Muscle motor
Running a simulation to validate and test the developed logic
Do-more! Designer Files
IDEC FL1F Smart Relay - WindLGC
(Siemens LOGO! PLC - LOGO!)
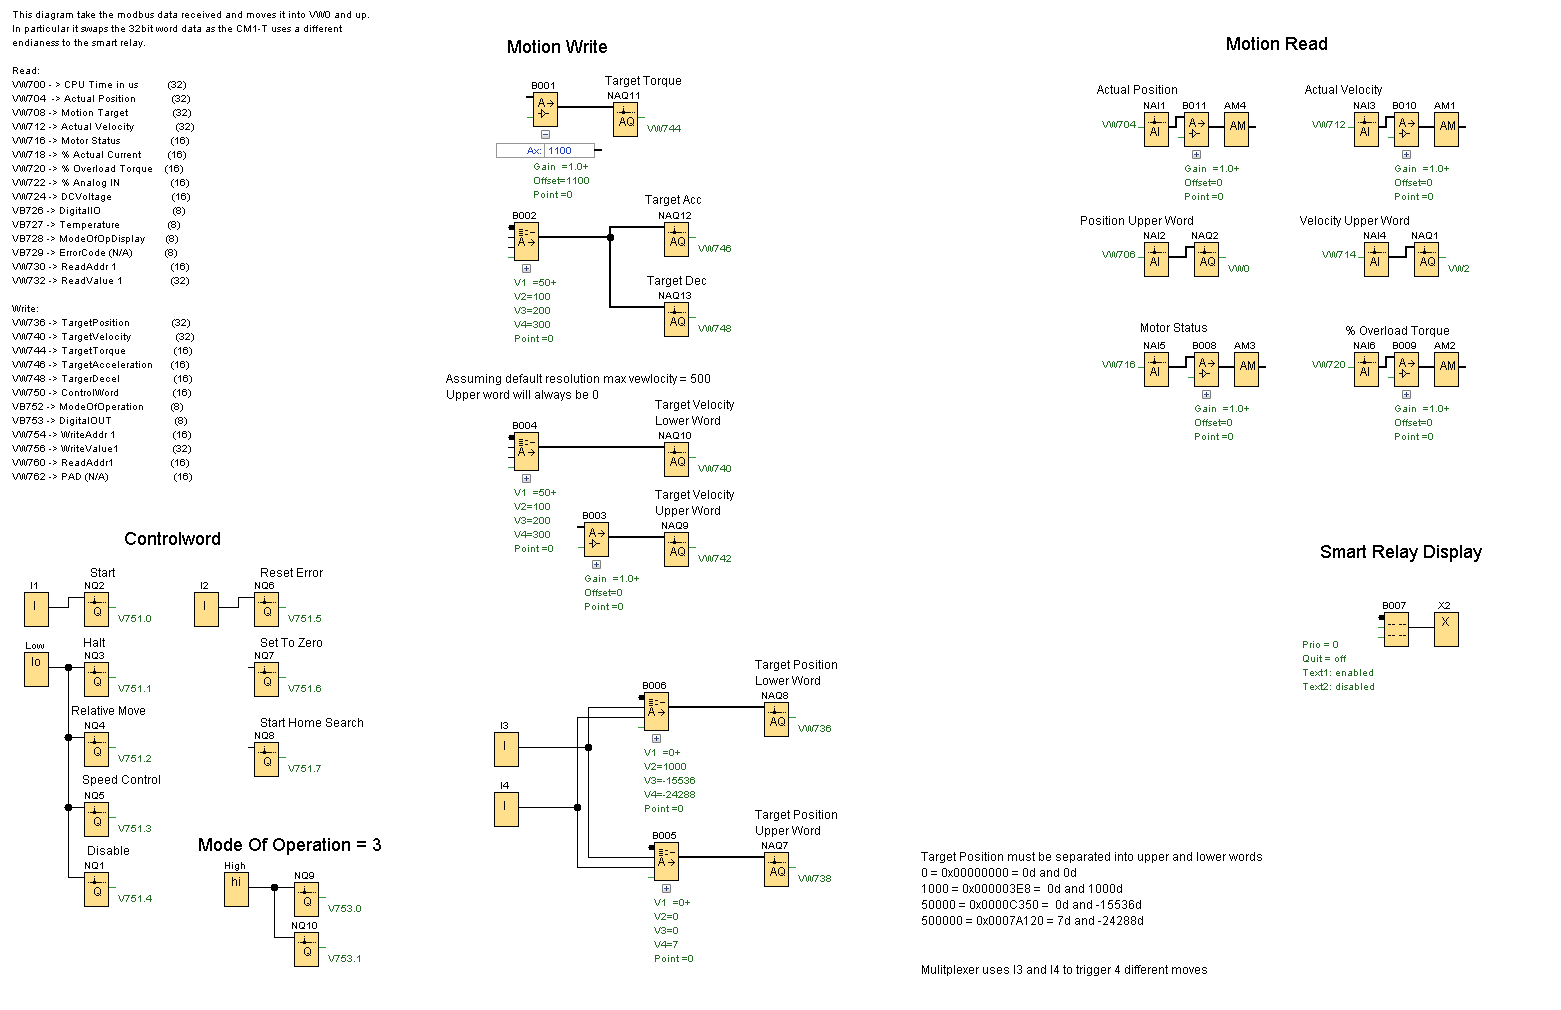
Modbus TCP - CM1-T connected to FL1F using Modbus TCP
The IDEC FL1F smart relay can be setup as a Modbus TCP Client (master). The Smart Relay is able to control the motor by directly writing to motion registers. The attached example sets the following
I1 - start
I2 - Reset from error state (over torque, etc)
I3 + I4 - input combination executes any of 4 absolute position moves
Display Output
Position (16bit as per PLC restrictions)
Speed
Torque
Motor Status
The FL1F can be setup to execute the motor using position, velocity or torque modes.