
Arcs
There are two formats you can use to complete an arc: you can define the center point of the arc and the end point, or you can define the radius of the arc and the end point.
Radius and End Point
If you imagine an arc between two points, there are four possible arcs that can be created if only the radius and the end point is defined. As illustrated in figure 13 below there is a small clockwise arc, a large clockwise arc, as well as a small counter clockwise arc, and a large counter clockwise arc.
By manipulating the @ and R values, it is possible to obtain all four of these arcs. R, the radius, will define the size of the arc, and @ will define whether we are travelling clockwise or counter clockwise. To make an arc, the radius set for motors one and two must be the same.
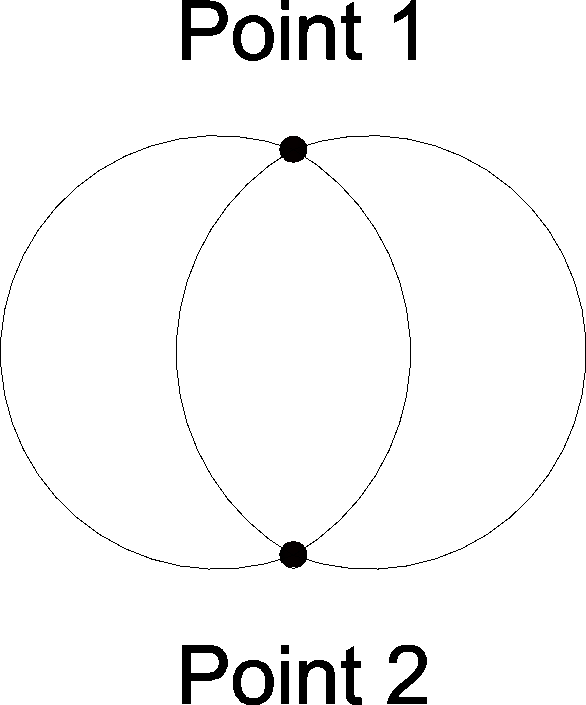
Fig 13 - Arcs with only radius and endpoint defined

CW Large Arc: @+ and R>0

CW Small Arc: @+ and R<0

CCW Large Arc: @- and R>0
CCW Small Arc: @- and R<0
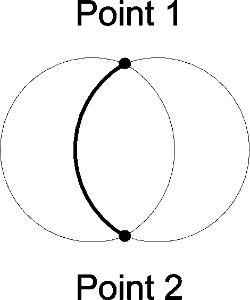
For Example, if we wish to make the following arc:
We could use the following program, assuming point 1 is (0,0) and point 2 is (0,-500). This means the radius is 353.
P2.1=-0, P2.2=-500
R1.1=353, R1.2=353
A1.1=10. A1.2=10
S1.1=10, S1.2=10

B1
|2.1, |2.2
A1.1, S1.1, A1.2, S1.2
R1.1, R1.2, @2.2+, @2.1+
END
In the above example, we are defining point 2 as (0,-500) and the radius as 353. The first line in the bank program sets the current position as 0, we then call the accelerations and speeds, calls the radius in R1.1 and R1.2 and executes the motion.
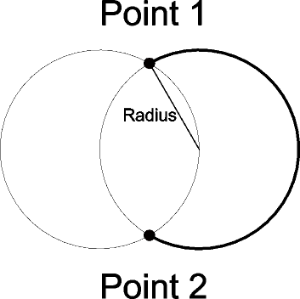
Contrarily, if we wanted to make the following arc:
We could use the exact same program, with the only change being that instead of the radius in R1.1 and R1.2 being set to 353, it would be set to -353.
Center and End Point
By using the center and end point method, the arc is completely defined with regards to the arc size and only the direction need to be specified.

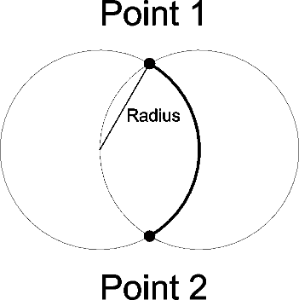
Fig. 14 - Center and end point definition
For example, if we wish to draw the arc in figure 14 using the center and end point method, we could do the following:
P2.1=-500, P2.2=-500
N1.1=0, N1.2=-500
A1.1=10. A1.2=10
S1.1=10, S1.2=10


B1
|2.1, |2.2
A1.1, S1.1, A1.2, S1.2
N1.1, N1.2, @2.2+, @2.1+
END
In the above example, we are defining point 2 as (-500,-500) and the center point as (0,-500). The first line in the bank program sets the current position as 0, we then call the accelerations and speeds, set the center point as N1.1, N1.2 and execute the motion.